
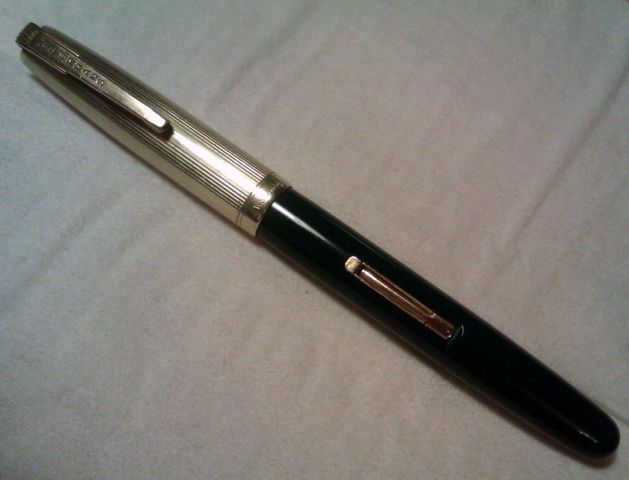
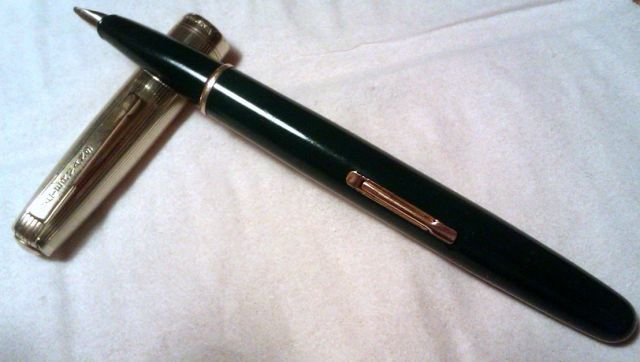
I bought a SJ on eBay the other day, and the 9048 nib was completely munted (tines about 10 degrees apart, feed at random angle) so in a "nothing to lose" spirit, I fashioned a wooden knock-out block and punched out the nib and feed from the threaded sleeve. I was then able to rehabilitate the nib with fingers and plastic-coated needlenose pliers, and reset the nib and feed into the the sleeve by hand. A very successful repair. I used the three finest micro-mesh pads to complete the smoothing of the nib.
So don't forget that although these are screw-in nibs, you can actually treat them like any other friction-fit nib/feed.
John

ESTERBROOK NIB UNITS
Started by johnmc2, Jun 07 2013 09:34 AM
14 replies to this topic
#2

Chi Town
-

- Members
-

- 37 posts
Member
- LocationAlbuquerque, New Mexico
Posted 10 June 2013 - 12:57 PM
INTERESTING???
Mike
Stipula Yellow Da Vinci Carbon Fiber T, Stipula Model T, Vintage Fountain Pens, Delta Amerigo Vespucci LE F/P, Pelikan Special Edition Sahara F/P, TWSBI Micarta, Danitrio Mikado,Genkai, Nakaya Decapod Cigar, Watley in Woodgrain!, Vintage Fountain Pen's, , Marlen Yellow Liberty LE 113/382, Santa Fe Style Custom "51" Made by Ralph Prather, president New Mexico Pen Collector's Club ca; 2010
#3
Ron Z
-

- Members
- 204 posts
Advisor
Posted 10 June 2013 - 01:56 PM
So don't forget that although these are screw-in nibs, you can actually treat them like any other friction-fit nib/feed.
Sometimes.
Look before you go whacking away to knock the feed out.
If you look at the underside of the collar around the nib, you will see that many have an indentation where the plastic has been pressed down. There's actually a cut at the deepest point, and it points toward the BACK of the nib. There is a corresponding notch in the feed. The purpose is to lock the feed in position so that the nib and feed don't rotate as you screw and unscrew the nib unit in the section. If you knock the nib out on one of these nibs, you can break the collar. At the least this pushed in piece will break off. At worst, the whole collar can break.
The way to handle this is to coax the nib out, warm the collar, rotate the feed so that the indentation is pushed up, then work the feed out.

A full service pen shop providing professional, thoughtful vintage pen repair...
Visit Main Street Pens
The Blue Fingers Blog is live! Ramblings and musings (and occasional repair tips) from the bench.
#5
Teej47
-

- Members
- 527 posts
journeyman
- LocationSpokane, WA
Posted 10 June 2013 - 07:21 PM
So don't forget that although these are screw-in nibs, you can actually treat them like any other friction-fit nib/feed.
Sometimes.
Look before you go whacking away to knock the feed out.
If you look at the underside of the collar around the nib, you will see that many have an indentation where the plastic has been pressed down. There's actually a cut at the deepest point, and it points toward the BACK of the nib. There is a corresponding notch in the feed. The purpose is to lock the feed in position so that the nib and feed don't rotate as you screw and unscrew the nib unit in the section. If you knock the nib out on one of these nibs, you can break the collar. At the least this pushed in piece will break off. At worst, the whole collar can break.
The way to handle this is to coax the nib out, warm the collar, rotate the feed so that the indentation is pushed up, then work the feed out.
I've been pretty successful with this method as well. Matter of fact, based on my not extensive experience, Esties aren't the only ones that don't like to let go of a feed until the nib has been teased out of the way first.
Tim
The only sense that's common is nonsense...
#6
johnmc2
-
- Members
- 123 posts
journeyman
- LocationNew Plymouth, New Zealand
Posted 10 June 2013 - 07:22 PM
Thanks Ron for that useful information. The nib collar did not have any such indentation, like you describe, but I had a look at some of my others and they do. Had I been working on one of those I would have asked for advice before proceeding as this is obviously a securing device. Interesting to know that they can be removed though, Does the nib just wiggle out?
Regards
John
Regards
John
#8
JonSzanto
-

- Members
- 1,021 posts
journeyman
Posted 15 June 2013 - 07:40 AM
Text on a screen so rarely carries a true tone, so I just want you to know I wasn't trying to be snarky. Case in point:That's very helpful, thank you.
Doing something successfully one time guarantees precisely nothing.
Earlier in the year I became interested in Waterman Taperites, courtesy an article by Paul Erano. Found one, and with very little effort got the section out and put a new sac in. Not a great pen, but a nice little pen. Procured another, slightly larger model. Had it in my hands for about 10 seconds before I cracked a big chunk of the barrel while trying to remove the section. Did some more reading. Found out they are somewhat famous for this. Found another similar model, nib not as good but the barrel would match. Applied great patience, along with some soaking and modest heat. Worked on the pen for about a week, a little at a time. Somewhere around Day 7 or 8, I was still applying the same light pressure when the barrel completely snapped in half.
That first Taperite really fooled me. I've given up on them, fortunately after the very last one I had gotten came to me in not only pristine condition, but is a pen head-and-shoulders above the other three. I'm not planning on tempting the Taperite fates again.
#9
johnmc2
-
- Members
- 123 posts
journeyman
- LocationNew Plymouth, New Zealand
Posted 15 June 2013 - 08:02 AM
Thank you for that clarification.Text on a screen so rarely carries a true tone, so I just want you to know I wasn't trying to be snarky. Case in point:
That's very helpful, thank you.
Doing something successfully one time guarantees precisely nothing.
Earlier in the year I became interested in Waterman Taperites, courtesy an article by Paul Erano. Found one, and with very little effort got the section out and put a new sac in. Not a great pen, but a nice little pen. Procured another, slightly larger model. Had it in my hands for about 10 seconds before I cracked a big chunk of the barrel while trying to remove the section. Did some more reading. Found out they are somewhat famous for this. Found another similar model, nib not as good but the barrel would match. Applied great patience, along with some soaking and modest heat. Worked on the pen for about a week, a little at a time. Somewhere around Day 7 or 8, I was still applying the same light pressure when the barrel completely snapped in half.
That first Taperite really fooled me. I've given up on them, fortunately after the very last one I had gotten came to me in not only pristine condition, but is a pen head-and-shoulders above the other three. I'm not planning on tempting the Taperite fates again.
I was considering bidding on a Taperite a few months ago but someone (I can't remember whether it was on FPN or here) warned me of their fragility. You must have been gutted at that second breakage!
Take care
John
#11
Ron Z
-
- Members
- 204 posts
Advisor
Posted 19 June 2013 - 05:22 PM
The first Taperite that I did was at a pen show. When I handed the pen back to it's owner when the restoration was completed, he turned to his friend and said "you owe me a beer."
Then there's the Taperiate Citation on which I replaced the end. It was perfect, it was glorious, the transition absolutely seamless. The rich burgundy color shiny and perfect. I finished restoring the pen and was thinking about where to price it when sold as I fiddled with the cap which didn't want to click into place, when the barrel snapped in half.... right through the lever and the imprint. I stared at it for a moment in disgust knowing full well that even though I could solvent weld the barrel back together again, the imprint would be damaged and maybe the repair visible. So I carefully removed the section and the lever with the pressure bar attached, and laid the rest on the bench. Then I picked up my hammer and beat the snot out it.
Then there's the Taperiate Citation on which I replaced the end. It was perfect, it was glorious, the transition absolutely seamless. The rich burgundy color shiny and perfect. I finished restoring the pen and was thinking about where to price it when sold as I fiddled with the cap which didn't want to click into place, when the barrel snapped in half.... right through the lever and the imprint. I stared at it for a moment in disgust knowing full well that even though I could solvent weld the barrel back together again, the imprint would be damaged and maybe the repair visible. So I carefully removed the section and the lever with the pressure bar attached, and laid the rest on the bench. Then I picked up my hammer and beat the snot out it.
A full service pen shop providing professional, thoughtful vintage pen repair...
Visit Main Street Pens
The Blue Fingers Blog is live! Ramblings and musings (and occasional repair tips) from the bench.
#12
Readymade
-

- Members
-
- 83 posts
Member
- LocationSingapore
Posted 21 June 2013 - 01:57 AM
LOL
Thanks! Needed that Haze over here in Singapore's getting everyone down.
Thanks! Needed that
Haze over here in Singapore's getting everyone down.
#13
JonSzanto
-
- Members
- 1,021 posts
journeyman
Posted 21 June 2013 - 07:05 AM
Oh, Ron, you just made my day - what a great story!! They are really 'special' aren't they? Just before I broke my second I was in a thread about them on FPG. One of the guys posted a pic: he was being very careful with the section, and managed to have not cracked the barrel where the section inserts. He had, however, managed to actually smash the barrel, actually collapse it, with just the pressure of his thumb as he was holding the barrel during the repairs.Then there's the Taperiate Citation on which I replaced the end. It was perfect, it was glorious, the transition absolutely seamless. The rich burgundy color shiny and perfect. I finished restoring the pen and was thinking about where to price it when sold as I fiddled with the cap which didn't want to click into place, when the barrel snapped in half.... right through the lever and the imprint. I stared at it for a moment in disgust knowing full well that even though I could solvent weld the barrel back together again, the imprint would be damaged and maybe the repair visible. So I carefully removed the section and the lever with the pressure bar attached, and laid the rest on the bench. Then I picked up my hammer and beat the snot out it.
I swear, in the next couple weeks I'm going to make a light box and figure out decent pen photog stuff, because the one Taperite that came out swell is one that I can't identify, I literally haven't seen a cap like this, but it doesn't feel like a Frankenpen...
Again, thanks. The thought of you plastering that pen is hilarious!
#14
johnmc2
-
- Members
- 123 posts
journeyman
- LocationNew Plymouth, New Zealand
Posted 21 June 2013 - 08:28 PM
Good story Ron
The one which I have bought was made in England. I wonder if the materials will be the same?
http://www.trademe.c...px?id=603317516
The one which I have bought was made in England. I wonder if the materials will be the same?
http://www.trademe.c...px?id=603317516


0 user(s) are reading this topic
0 members, 0 guests, 0 anonymous users

